Combat Guide
Quick answers
- How does combat work in Iron Realms?
- Marches and rallies carry troops to a target; battles resolve from a server-issued seed so results cannot be manipulated client-side. Troop types counter each other in a triangle, terrain slows attackers and aids defenders, and losses are distributed across the stacks sent.
- Is Iron Realms free to play?
- Yes. Iron Realms is free to play in any browser with no download and no account required. Every building, troop tier and Seat of Power is reachable without spending money — purchases buy speed and cosmetics, never a higher ceiling.
- Does spending money make you stronger in Iron Realms?
- No. Nothing purchasable raises your power ceiling. A charter audit runs on every build and fails it if any offer would sell power. During the pre-alpha nothing is for sale at all — better than that, the store gives its goods away: everything in it is free to take, once a day per item, while the realm is being built. When payments do open, spending will compress time only: it clears timers, it never raises the summit.
- How long does it take to max a keep in Iron Realms?
- Keeps cap at level 45 and troops at tier 13 — the same summit for everyone, and it is a campaign: about seven months of steady play at half an hour a day, counting keep 45 and the nineteen plots that gate it. The Fair Play ledger inside the game reads that figure straight out of the shipped constants, so it is never a month behind the build.
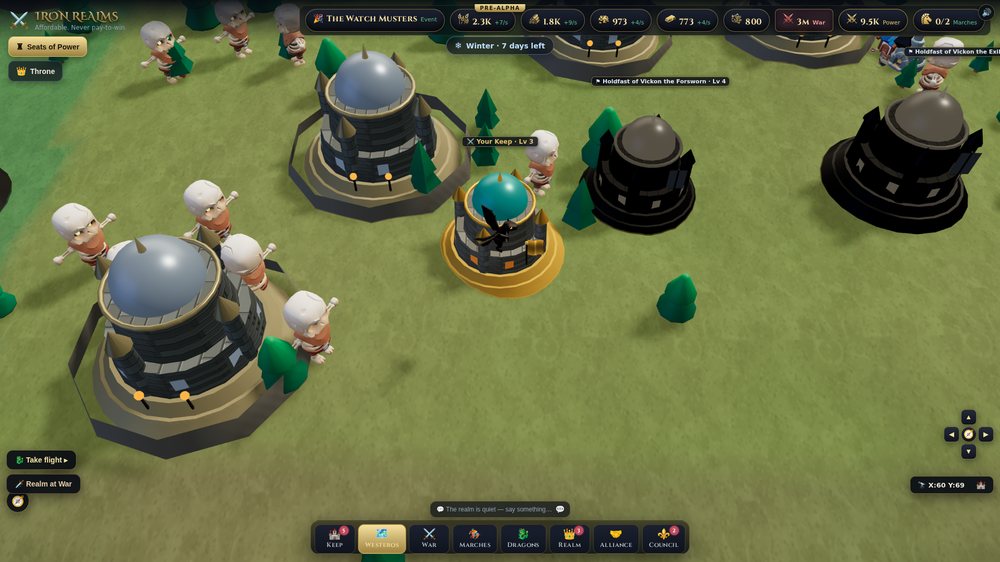
Battles in Iron Realms are won before the swords meet — in the troops you bring, the counters you pick, the terrain you fight on, and the timing of your march. Here is everything you need to fight well, from clearing your first camp to storming a Seat of Power.
The troop triangle
Every fight starts here. Three fighting types beat each other in a ring, and a fourth cracks walls:
| Type | Strong vs | Weak vs |
|---|---|---|
| 🛡️ Infantry | Cavalry | Ranged |
| 🏹 Ranged | Infantry | Cavalry |
| 🐎 Cavalry | Ranged | Infantry |
| 💥 Siege | Walls & fortifications | Everything in the open field |
Scout first, then bring the type that beats what they lead with. Bring siege when there are walls to break — and keep it protected, because it folds in a straight fight.
Tiers
Troops climb tiers (up to T13) as your Training Yard and research grow. A higher-tier soldier is worth several lower-tier ones, so upgrading your troop tier is one of the strongest things you can do — see Research and Build Order.
How much of your host to send
An attack is not all-or-nothing. Every strike offers 25% / 50% / 100% of your standing army, and it is a real decision: a quarter-host that wins takes the same spoils per surviving sword and leaves you a garrison at home. Send everything only when you are sure, or when you have a shield up.
Marches: attack, scout, reinforce
- Scout — send fast, cheap eyes to reveal a target's garrison and lean before you commit. Never siege blind.
- Attack — the assault. March time depends on distance and the terrain you cross.
- Reinforce — send troops to bolster an ally's keep, a seat, or a fort.
Rallies — the alliance hammer
A rally gathers many lords' troops behind one commander and launches as a single overwhelming host. It is how alliances take seats, forts, and rival keeps that no single player could crack. An officer opens the rally; members join with troops. Rally, reinforce, gift, shield and anti-scout all live together in the War drawer in-game — that is the one screen to learn if you intend to fight alongside anyone; it rides when the roster fills or the timer ends. You can recall a rally you opened before it lands.
Sieging a Seat of Power
- Read the seat: on unheld ground, scout its garrison and star rating — higher stars mean a tougher defender bonus, and count the banner's other seats in that region — each beyond the first adds +5% to the defender, to +30%; on a player-held seat the panel's live readout shows the walls and stationed defence instead.
- Account for terrain: the defender gains an edge on strong ground, and your march slows crossing rough country.
- Grind, inside a war window (three a day, at 02:00–04:00, 10:00–12:00 and 18:00–20:00 UTC): assaults and rallies wear down walls, garrison and reinforcements — but winning a fight never flips the seat on its own.
- Claim it: once the defence is fully cleared — walls at zero, garrison dead, reinforcements spent — the breach is yours (and your alliance's) for 10 minutes. Land a Takeover or Takeover Rally blow inside that window and the banner changes.
- Hold it: your walls restart at 1.2× the tier's base, so station a garrison at once. A seat grants realm-wide buffs to your alliance, but rivals will come for it. See Alliances & Seats of Power and Seats of Power.
Two rules the server enforces at the walls: blows land no faster than one every 2 seconds, whatever a client claims — the old ten-minute per-seat cooldown is gone — and every attack bonus a lord brings is capped at +3.0 server-side, so no stacked buff (or doctored client) can swing harder than the design allows.
Terrain
The map is not flat. Defenders on favourable ground fight harder, and marches slow crossing forests, hills, and rivers. Read the tile before you commit, and route around the worst ground when time matters.
Defence: shields & the wall-break valve
- You are warned. A real inbound attack raises a banner, sounds a horn and buzzes the phone, with the host's size and its arrival time — you have minutes to reinforce, shield or empty the coffers. Ramparts and traps fell raiders before the walls are reached, and the battle report names their work on its own line. Wounded troops go to the infirmary up to its capacity; anything past that is lost. Peace shields — new lords get a founding shield, and you can raise one to sit out a beating. A shield is a promise both ways: while it stands, no player, creature or raid can touch your keep — your Seats of Power are public ground and stand outside it, defended by garrison and reinforcements alone — and attacking another player drops it. The game asks before it falls (“Drop your peace shield?”), so the choice is always yours; hunting monsters, clearing camps and storming unheld or NPC ground never touches your bubble. A shielded keep wears a visible dome on the map, yours included.
- Garrison your own keep with the right counters and keep a hospital so losses heal rather than die.
- Wall-break safety valve — if your defence is wiped entirely, the realm relocates you and raises a shield. It is applied, not offered; you do not have to be awake to take it, so a single loss never ends your game.
- Traps and defensive research harden your walls against raiders.
Rebels, camps & the open world
- Creature camps — the friendliest fights: quick, low-risk, good for commander XP and materials.
- Rebel holdfasts — keep-style battles with walls and a garrison lean to counter-pick. Real resource loot and blade drops.
- Both scale with the danger of the land — the further from safe country, the tougher and richer.
Dragons in battle
A dragon riding with your march is a force multiplier — breath, growth-gated abilities, and dragon gear all tip a fight. Grow and gear your wyrm and lead your biggest assaults with it. See Dragons.
Reading the battle report
Every fight produces a report — on land and, since 1.1.225, at sea and in the defence of a seat you hold: who you faced, what was lost and healed, and exactly what you carried off. Read it — it tells you whether your counters were right and whether the next assault needs more force.